
September 21, 2026
connectc1
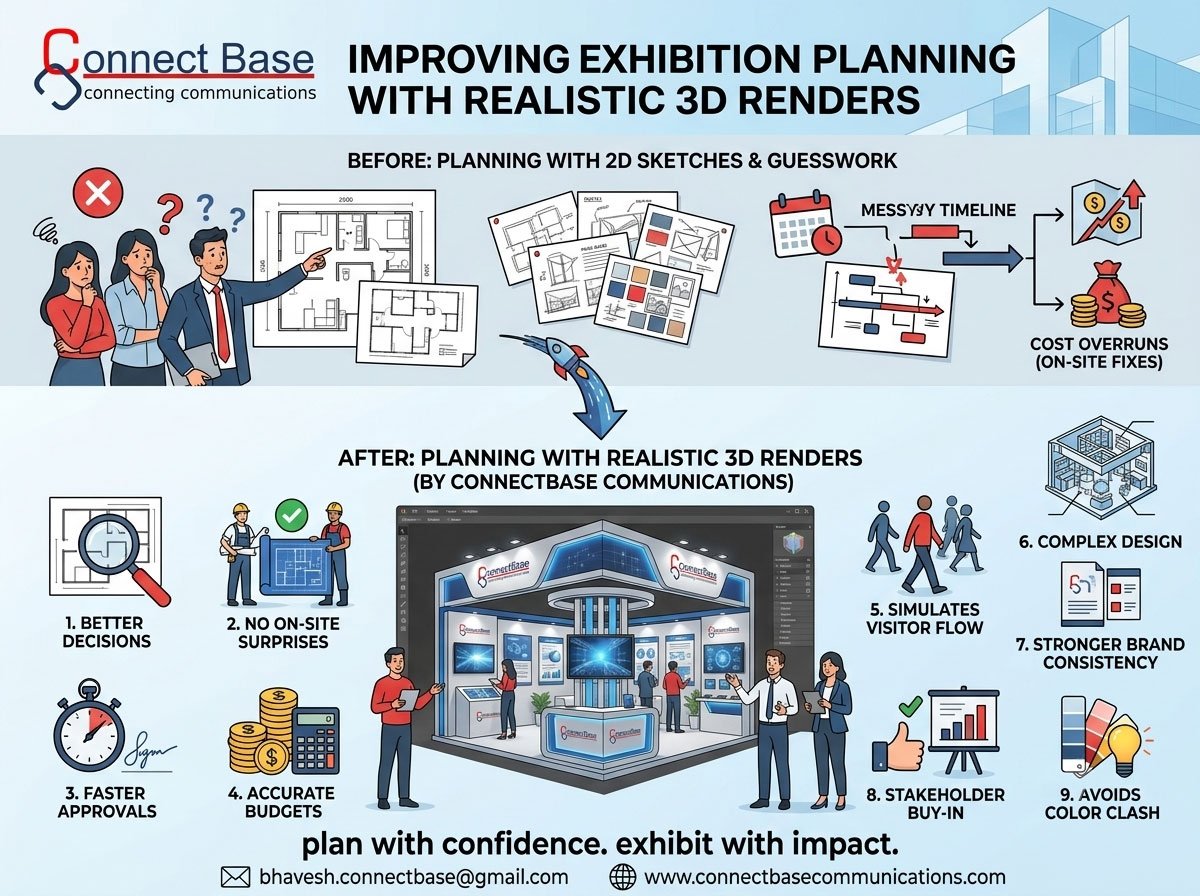
Exhibition planning used to run almost entirely on guesswork. A brand would approve a flat 2D floor plan, sign off on a mood board, and then wait — sometimes nervously — until the stall was physically built on-site to see how everything actually looked together. By then, it was too late to fix a color that clashed, a layout that felt cramped, or a brand wall that didn’t get the visibility it deserved.
That’s exactly the problem realistic 3D exhibition stall renders solve. Today, 3D visualization has become one of the most valuable tools in exhibition planning, giving exhibitors a lifelike preview of their stand before a single panel is fabricated. At Connectbase Communications, we’ve seen firsthand how this single step transforms the entire exhibition journey — from concept approval to final execution — for our clients across custom exhibition stall design and portable exhibition stands.
In this blog, we’ll break down what realistic 3D rendering actually means, why it matters for exhibition planning, and how it helps brands save time, money, and stress before stepping onto the show floor.
What Are 3D Exhibition Stall Renders?
A 3D exhibition stall render is a photorealistic digital visualization of your stand — complete with accurate lighting, materials, branding, furniture, signage, and even the surrounding booth environment. Unlike a basic sketch or a flat 2D layout, a 3D render shows exactly how your exhibition stand will look and feel in real life, from multiple angles, before construction even begins.
Modern rendering software allows designers to simulate:
- Real material textures (wood, acrylic, fabric, metal, glass)
- Accurate lighting conditions, including spotlighting and ambient lighting
- True-to-brand color schemes and finishes
- Furniture placement, product displays, and walkway flow
- Digital screens, graphics, and signage exactly as they’ll appear
- Crowd movement and visitor sightlines within the booth space
This level of detail means what you see in the render is, for all practical purposes, what you’ll get on the exhibition floor.
Why Exhibition Planning Needed This Upgrade
Trade shows and exhibitions are high-stakes, high-cost, time-bound events. Exhibitors typically get one shot to make an impression, and stall construction timelines are tight. Traditional planning methods — hand-drawn concepts, static mood boards, or simple wireframe layouts — left too much room for miscommunication between the client, the designer, and the fabrication team.
A design that looks fine on paper can feel completely different in three-dimensional space. A color combination that seems bold in a swatch can look overwhelming under exhibition hall lighting. A layout that seems spacious in a floor plan can feel cramped once furniture, screens, and staff are added in.
Realistic 3D rendering closes this gap by giving everyone involved — the brand team, the design agency, and the production crew — a shared, accurate reference point from day one.
Key Benefits of Realistic 3D Renders in Exhibition Planning
1. Better Decision-Making Before Construction Begins
The single biggest advantage of 3D rendering is that it moves critical decisions earlier in the process. Instead of approving a concept based on imagination and a 2D sketch, stakeholders can review a fully rendered stand and make informed choices about layout, branding placement, and material selection — all before fabrication starts.
This is particularly valuable for brands managing exhibition planning across multiple stakeholders or approval layers, such as marketing heads, regional teams, or global brand guidelines committees. A realistic render gives everyone the same visual reference, reducing the back-and-forth that often comes from misinterpreted design briefs.
2. Fewer Costly On-Site Surprises
Exhibition stalls are expensive to build and even more expensive to fix once construction is underway or, worse, once the stand is already at the venue. A wall panel that’s the wrong size, a logo that’s misaligned, or a color that doesn’t match the brand palette can mean last-minute scrambling and unplanned costs.
With a realistic 3D render, these issues are caught and corrected digitally — where changes cost nothing but time — rather than physically, where changes cost money, labor, and stress. This is one of the main reasons brands working with our end-to-end exhibition stand fabrication team insist on a rendering stage before approving any build.
3. Accurate Budgeting and Resource Planning
When a design exists only as a rough sketch, estimating costs is largely guesswork. Realistic 3D renders allow designers to finalize exact dimensions, materials, and finishes, which in turn allows for far more accurate cost estimation and material procurement.
This precision helps exhibitors avoid two common budgeting pitfalls: underestimating costs (leading to mid-project scope cuts) or overestimating and over-ordering materials that go to waste. A detailed render essentially works as a blueprint for both the creative and the financial side of exhibition planning.
4. Stronger Brand Consistency Across Every Element
Every exhibition stand needs to reflect brand identity consistently — logo placement, color palette, typography, and even lighting tone all play a role in how a brand is perceived on the show floor. Realistic renders let brand managers verify that every visual element aligns with brand guidelines before the stand is built.
This is especially important for companies exhibiting across multiple events or regions, where consistency in exhibition stall design directly affects brand recognition. A render acts as a final quality check, ensuring nothing slips through that could dilute the brand experience.
5. Improved Visitor Flow and Booth Functionality
A stand isn’t just about how it looks — it’s about how it functions. Visitor movement, sightlines to key displays, staff positioning, and product showcase zones all need careful planning. 3D renders allow designers to simulate footfall patterns and identify potential bottlenecks, blind spots, or awkward transitions within the booth space.
This kind of functional testing is nearly impossible with a flat floor plan but becomes intuitive once you can “walk through” a rendered 3D space. It’s a major reason 3D visualization has become standard practice in our exhibition booth design process.
6. Faster Client Approvals and Reduced Revision Cycles
When clients can see a realistic preview of their stand rather than trying to visualize it from a 2D drawing, approvals happen faster and revision cycles shrink significantly. Instead of vague feedback like “make it feel more premium” or “I’m not sure this will work,” clients can point to specific elements within the render and request precise changes.
This clarity speeds up the entire exhibition planning timeline — a critical advantage when working against fixed show dates and fabrication deadlines.
7. A Powerful Tool for Internal Buy-In and Stakeholder Presentations
Exhibition budgets often need sign-off from multiple internal stakeholders, some of whom may not be present during the design process. A photorealistic 3D render becomes an effective communication tool for pitching the design internally — to leadership, marketing committees, or global headquarters — without needing them to interpret technical drawings.
Because the render looks like a finished photograph rather than a technical document, it’s far easier for non-design stakeholders to understand, react to, and approve.
8. Confidence in Custom and Complex Designs
For brands pursuing highly customized stand designs — multi-level structures, interactive zones, unique architectural elements, or elaborate branding installations — realistic rendering is almost essential. Complex designs are the hardest to visualize from sketches alone, and the risk of misalignment between vision and execution is highest.
3D rendering removes this uncertainty, allowing even the most ambitious custom exhibition stall design concepts to be validated visually before a single piece of material is cut.
How the 3D Rendering Process Typically Works
While every design studio has its own workflow, the process generally follows these stages:
- Brief and concept development – Understanding brand goals, target audience, space dimensions, and key messaging priorities.
- Initial 2D layout – A basic floor plan establishing zones, traffic flow, and functional areas.
- 3D modeling – Converting the 2D layout into a three-dimensional structure with accurate measurements.
- Texturing and material application – Adding realistic finishes, colors, and branding elements.
- Lighting simulation – Applying lighting setups that mimic real exhibition hall conditions.
- Client review and revisions – Presenting the render for feedback and making refinements.
- Final approval and handover to fabrication – Using the finalized render as the blueprint for construction.
This structured approach is exactly what we follow at Connectbase Communications, ensuring that what our clients approve on-screen is what they get on the show floor.
Common Mistakes Avoided Through 3D Rendering
Realistic renders help exhibitors sidestep several recurring exhibition planning mistakes:
- Misjudged scale — elements that look proportionate on paper but overwhelm or underwhelm in real space
- Poor lighting placement — leading to shadows on key branding or products
- Clashing color combinations — that look different under exhibition lighting versus screen or print
- Overcrowded layouts — that restrict visitor movement and interaction
- Inconsistent branding — where logos, fonts, or colors don’t match approved guidelines
- Unrealistic material expectations — where a chosen finish doesn’t photograph or reflect light as expected
Each of these issues is far cheaper to catch in a digital render than during physical construction at the venue.
Why This Matters More in Competitive Exhibition Spaces
As trade shows and exhibitions become more visually competitive, first impressions matter more than ever. Attendees often decide within seconds whether a stand is worth approaching. Because 3D renders allow for meticulous refinement of every visual detail — lighting, layout, branding, and finishes — exhibitors using this process consistently show up with stands that feel more polished, more intentional, and more aligned with their brand identity.
This is also why realistic rendering has become a standard offering across our exhibition stand design services, rather than an optional add-on. It’s no longer just a design preview — it’s a core part of strategic exhibition planning.
Final Thoughts
Realistic 3D exhibition stall renders have fundamentally changed how brands plan, budget, and execute their exhibition presence. By replacing guesswork with a lifelike, accurate preview, exhibitors gain clarity, reduce costly on-site errors, and ensure every design decision aligns with their brand identity before construction even begins.
Whether you’re planning a compact modular stand or an elaborate custom-built exhibition space, investing time in the rendering stage pays off in smoother execution, faster approvals, and a stronger final result on the show floor.
At Connectbase Communications, realistic 3D visualization is built into every stage of our exhibition stall design process — helping brands plan with confidence and exhibit with impact.
📩 Ready to see your next exhibition stand before it’s built? Reach out to us at bhavesh.connectbase@gmail.com or visit www.connectbasecommunications.com to start your project.
