
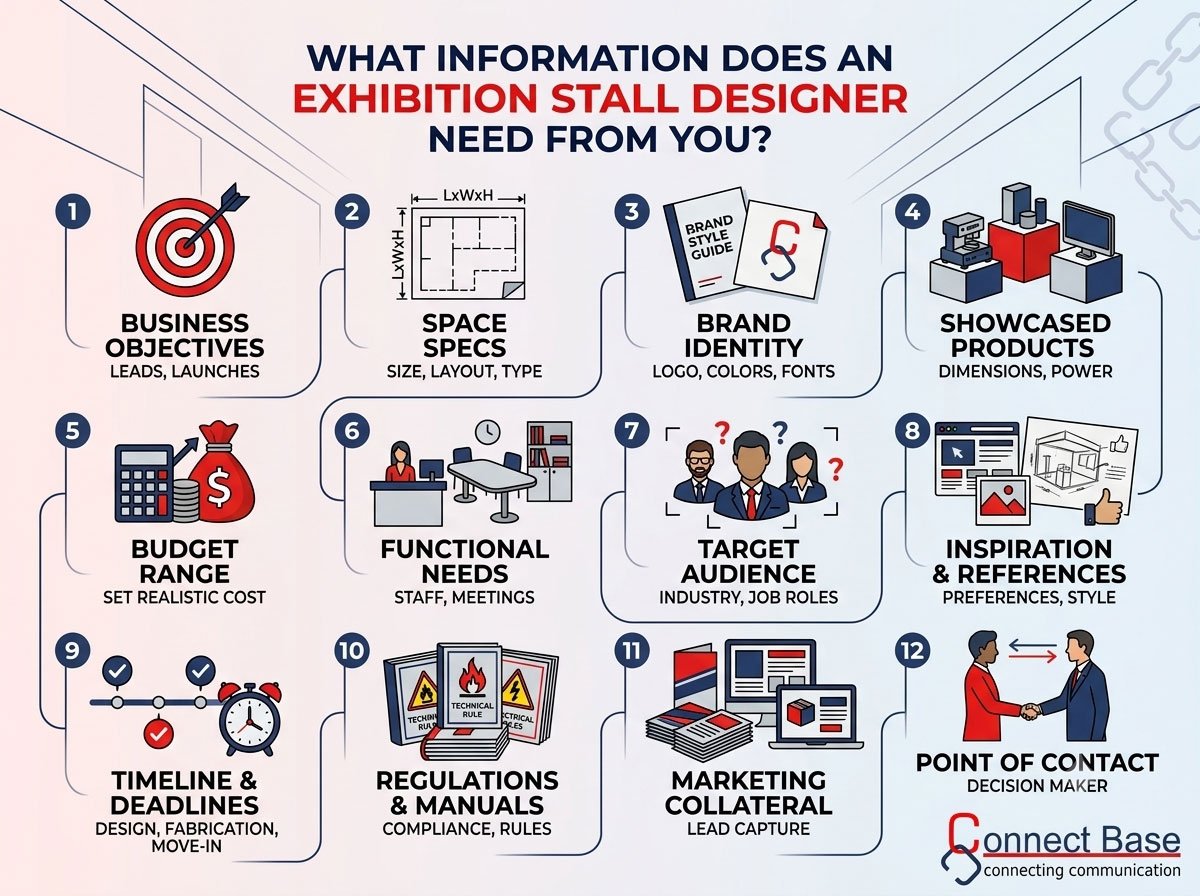
Introduction
Exhibitions and trade shows remain one of the most powerful platforms for businesses to showcase their products, generate leads, and build brand credibility face-to-face. But the difference between a stall that gets ignored and one that pulls crowds often comes down to one thing: how well you brief your exhibition stall designer.
Many exhibitors walk into a design meeting expecting the designer to “just come up with something creative.” While creativity is exactly what a good exhibition stall designer brings to the table, that creativity works best when it’s guided by clear, accurate information about your brand, your goals, and your budget. Without the right inputs, even the most talented design team ends up guessing — and guesswork rarely results in a stall that meets your expectations or converts visitors into customers.
At Connectbase Communications, we’ve designed and executed exhibition stalls across countless industries, and if there’s one lesson we’ve learned repeatedly, it’s this: the best stalls are built on the best briefs. In this article, we’ll walk you through exactly what information your exhibition stall designer needs from you — so your next exhibition becomes a true return on investment rather than just another expense on the marketing calendar.
1. Your Business Objectives for the Exhibition
Before a single sketch is made, your designer needs to understand why you’re exhibiting in the first place. Different objectives call for very different stall designs.
Ask yourself:
- Are you launching a new product?
- Are you trying to generate leads for your sales team?
- Are you building brand awareness in a new market?
- Are you meeting existing clients and strengthening relationships?
- Are you scouting for distributors, franchisees, or investors?
A stall built to generate high-volume walk-in leads looks completely different from one designed for private, high-value client meetings. The former needs open, inviting frontage and interactive displays; the latter may need semi-private meeting pods and a more exclusive, boardroom-style ambience.
Tip: Write down your top one or two objectives in order of priority. This single step alone will shape 50% of your stall’s layout and design direction.
2. Stall Size, Location, and Exhibition Hall Layout
Your exhibition stall designer cannot design in a vacuum — they need the technical specifications of your allotted space.
Information to share:
- Stall dimensions (length x width, and ceiling height restrictions)
- Stall type — is it a corner stall, island stall (open on all four sides), peninsula, or an inline/row stall?
- Hall layout plan — where is your stall positioned relative to entrances, food courts, competitor stalls, and high-traffic aisles?
- Height restrictions set by the exhibition organizer (many venues cap stall height at 4m for standard stalls, higher for custom-approved structures)
- Load-bearing capacity of the flooring, if you’re planning heavy machinery displays
Corner and island stalls offer far more design freedom, with visibility from multiple sides, while inline stalls need a strong, eye-catching frontage since visitors approach from one direction only. Sharing your exact space type early prevents costly redesigns later.
3. Your Brand Guidelines and Identity Assets
Your exhibition stall is a three-dimensional extension of your brand. It needs to look and feel unmistakably “you” — even from across a crowded exhibition hall.
Share the following with your designer:
- Logo files in vector format (AI, EPS, or high-resolution PNG)
- Brand color codes (Pantone, CMYK, and HEX values)
- Approved fonts and typography
- Brand guideline documents, if your company has one
- Existing marketing collateral — brochures, catalogues, packaging, or previous stall designs — so the designer understands your visual language
- Tagline or key messaging you want prominently displayed
A designer working without proper brand assets often has to reconstruct logos or guess at colors, which can lead to inconsistencies that dilute your brand identity on the show floor.
4. Products or Services You’re Showcasing
This is the heart of your exhibition stall — what exactly will be on display?
Provide details such as:
- List of products/services to be featured, ranked by importance
- Physical dimensions and weight of products (especially for machinery, vehicles, or large equipment)
- Special display requirements (refrigeration, lighting, rotating platforms, screens, glass casing, etc.)
- Whether products need power, water, internet connectivity, or ventilation
- Any live demonstrations you plan to conduct on the stall
If you’re showcasing 20 products but only have space to comfortably display 6, your designer needs to know this in advance so they can plan a rotation system, digital catalogue screens, or a hero-product zone rather than cramming everything in and creating visual clutter.
5. Budget Range
This is often the most uncomfortable conversation for exhibitors, but it’s also the most important one. Your budget directly determines the materials, structure type, and finishing your designer can propose.
Be transparent about:
- Your total budget, including design, fabrication, installation, and dismantling
- Whether the budget includes furniture, AV equipment, and graphics, or if these are separate
- Any flexibility in the budget for high-impact elements
- Past exhibition spending, if this helps set realistic expectations
An experienced exhibition stall designer, like the team at Connectbase Communications, can create striking designs across a wide range of budgets — but only when we know the real number upfront. Vague budget answers often lead to design revisions, wasted time, and last-minute compromises that hurt the final output.
6. Functional Requirements
Beyond aesthetics, your stall needs to function well for your team and your visitors. Think through the practical needs of your exhibition days.
Key functional elements to discuss:
- Reception/welcome counter — do you need one, and how many staff will be there?
- Meeting areas — private cabins, semi-open lounges, or open discussion tables?
- Storage space — for brochures, giveaways, staff belongings, and backup stock
- Pantry or refreshment area — for hosting clients or staff breaks
- Number of staff working the stall at any given time (this affects space planning and furniture count)
- Technology needs — LED walls, product demo screens, charging stations, Wi-Fi routers
- Seating capacity required for meetings or presentations
Skipping this step often results in beautiful stalls that are impractical to actually work in — overcrowded, lacking storage, or without enough space for genuine client conversations.
7. Target Audience and Visitor Experience
A stall designed for engineers evaluating industrial equipment needs a very different tone from one designed for retail buyers or lifestyle consumers.
Share insights on:
- Who is your ideal visitor? (job roles, industry, decision-making power)
- What questions or concerns do they typically have?
- What kind of first impression do you want to create — premium and exclusive, friendly and approachable, bold and innovative, or technical and authoritative?
- Do you want an interactive experience (touchscreens, VR/AR demos, games, live product trials) or a more informative, conversation-driven approach?
This information helps your exhibition stall designer choose the right materials, lighting tone, color psychology, and layout flow to genuinely resonate with the people walking through the door.
8. Reference Designs and Inspiration
While your designer will bring original creative concepts, sharing reference images helps align expectations from day one.
You can provide:
- Screenshots or photos of stalls (yours or competitors’) that you liked
- Design styles you admire — minimalist, industrial, luxurious, futuristic, etc.
- Elements you specifically don’t want (certain colors, cluttered layouts, particular materials)
- Previous stall photos, along with feedback on what worked and what didn’t
This isn’t about copying another design — it’s about giving your designer a visual vocabulary to understand your taste, so the concept presentation is closer to your vision on the very first draft.
9. Timeline and Deadlines
Exhibition stall design and fabrication involves multiple stages — concept design, approval, 3D visualization, fabrication, transportation, on-site installation, and dismantling. Each stage takes time.
Share:
- Exhibition dates (setup day, show days, dismantling day)
- Deadline for stall design approval by the organizer, if applicable
- Internal approval timelines within your own company (especially if multiple stakeholders need to sign off)
- Any fixed deadlines for marketing material, giveaways, or signage printing
Starting the design process at least 6-8 weeks before the exhibition (longer for custom or large-format stalls) gives enough room for revisions, approvals, and quality fabrication — without the stress of a last-minute rush.
10. Statutory and Organizer Guidelines
Every exhibition venue and organizer has its own set of rules regarding stall construction, and your designer needs this information to avoid on-site rejections or penalties.
Important documents to share:
- Exhibitor manual issued by the event organizer
- Height, weight, and structural restrictions
- Fire safety and electrical compliance requirements
- Rules on rigging, hanging banners, or double-deck stalls
- Move-in and move-out time slots
Overlooking these guidelines can lead to your stall being flagged, modified forcibly on-site, or even denied approval — a risk no exhibitor wants right before a show.
11. Marketing Collateral and Giveaways
While not core to the structural design, your designer should know what collateral will be placed on the stall so the layout accommodates it properly.
Mention:
- Brochures, standees, or catalogues you’ll display
- Giveaways or merchandise (and their storage/display needs)
- Digital content — videos, presentations, or product demos to be run on screens
- Any lead-capture tools (QR codes, tablets, business card bowls)
12. Point of Contact and Decision-Making Process
Finally, clarify who on your team the designer should coordinate with throughout the project.
Establish:
- A single point of contact for approvals and feedback
- Who has final sign-off authority on the design
- Preferred communication channels and frequency of updates
A clear decision-making chain avoids confusion, conflicting feedback, and delays — keeping your project on schedule.
Why a Detailed Brief Makes All the Difference
Think of your exhibition stall designer as a translator — turning your business goals into a physical, three-dimensional brand experience. The richer and more accurate the information you provide, the more precisely that translation reflects your vision. A vague or incomplete brief forces designers to fill in gaps with assumptions, which often means more revision rounds, delayed timelines, and a final stall that doesn’t quite hit the mark.
On the other hand, a well-prepared brief — covering your objectives, space, brand identity, products, budget, functional needs, audience, references, timeline, and compliance requirements — sets your designer up to deliver a concept that’s on-brand, functional, and impactful from the very first presentation.
Partner With Connectbase Communications for Your Next Exhibition
At Connectbase Communications, we specialize in designing exhibition stalls that don’t just look good — they perform. From concept design and 3D visualization to fabrication, on-site installation, and dismantling, our team handles every detail so you can focus on what matters most: connecting with your visitors and growing your business.
Whether you need a compact inline stall or a large custom island structure, we start every project with a thorough briefing process to ensure your stall reflects your brand and meets your exhibition goals precisely.
Ready to start planning your next exhibition stall?
🌐 Visit us at: www.connectbasecommunications.com 📧 Email us at: bhavesh.connectbase@gmail.com
Let’s build a stall that turns visitors into customers.
Frequently Asked Questions
1. How far in advance should I contact an exhibition stall designer? Ideally, 6-8 weeks before the exhibition for standard stalls, and 10-12 weeks for large or custom-built structures, to allow adequate time for design, approvals, and fabrication.
2. Do I need to have my budget finalized before the first meeting? Not entirely finalized, but having a realistic range ready helps your designer propose materials and design concepts that fit within your means from the start.
3. Can a designer work without my brand guidelines? They can, but the result may not be fully consistent with your existing brand identity. Sharing logo files, colors, and fonts leads to a far more accurate and professional outcome.
4. What if I don’t know my target audience clearly? Your designer can help you define this through a short discovery conversation, but even basic information about who typically buys from you is a valuable starting point.
5. Is it necessary to share the exhibitor manual with my designer? Yes. It contains critical structural, safety, and compliance rules that directly affect what can and cannot be built for your stall.
