
October 14, 2026
Connectbase Communications
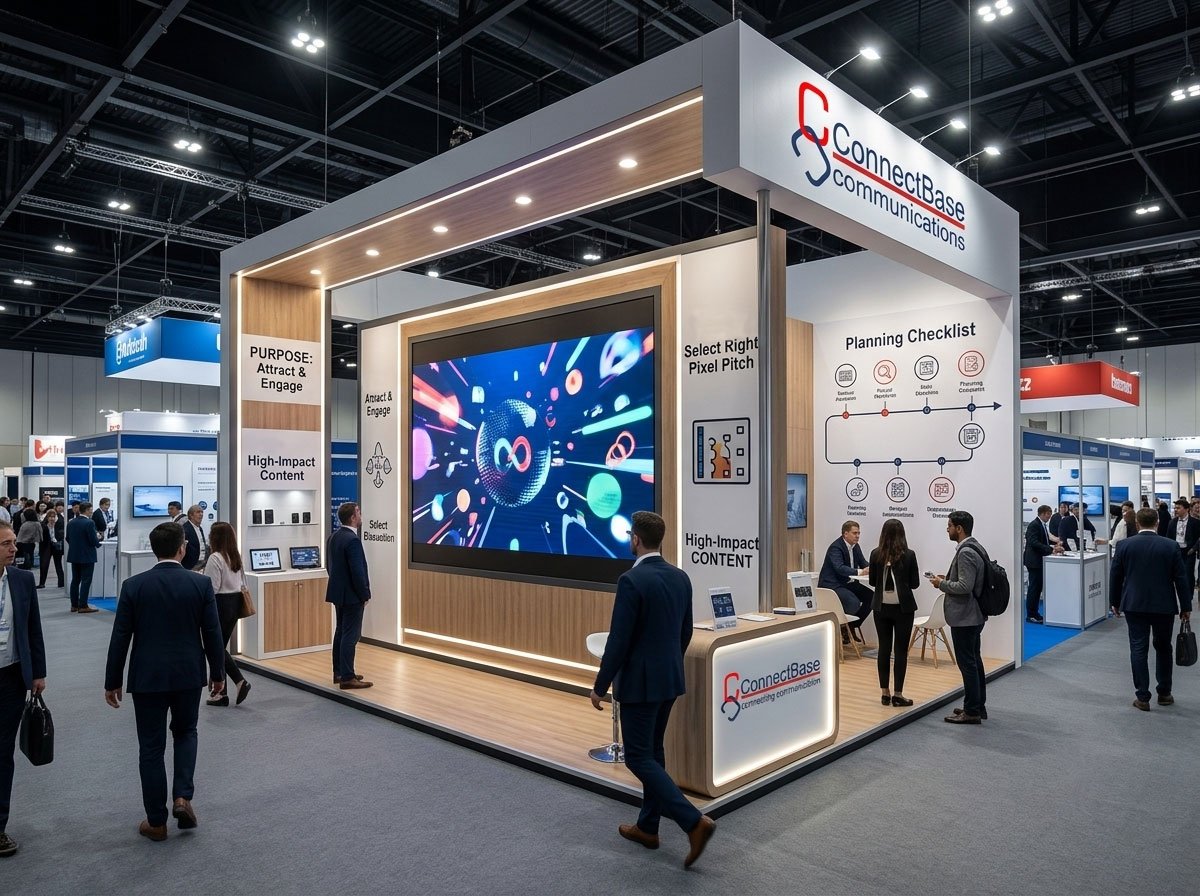
Walk through any busy trade show hall and you will notice the same thing. Visitors look first at what moves. A bright, well-placed LED video wall can pull people out of the aisle and into your stall in seconds. A badly planned one can do the opposite, with washed-out colours, blurry text, unreadable content and a screen that overwhelms the rest of the stand.
At Connectbase Communications, we design and build exhibition stalls for brands across India. We have seen LED video walls turn average stands into memorable ones, and we have seen expensive screens wasted for lack of planning. This guide covers what to consider before you add an LED video wall to your exhibition stall.
Why LED Video Walls Work in Exhibition Stalls
An exhibition hall is a noisy, crowded, visually competitive place. Dozens of stalls fight for the same few seconds of attention. LED video walls help for several reasons:
- Motion attracts attention. People notice movement faster than static graphics, even from far down the aisle.
- They tell your story fast. A 30-second loop can explain what your company does, show a product in action and end with a clear call to action.
- They are flexible. You can change content between days, shows or audiences without reprinting anything.
- They create a premium impression. A seamless, high-quality display signals a confident, modern brand.
- They work with other elements. LED walls blend well with lighting, 3D structures and interactive zones.
Still, a video wall is a tool, not a strategy. It only delivers results when it supports your exhibition goals.
Step 1: Define the Purpose of Your LED Video Wall
Before choosing sizes or specifications, decide what the screen must do. Common goals include:
- Attracting visitors from a distance with bold, simple, high-impact visuals.
- Demonstrating products that are too large, complex or expensive to bring to the show.
- Telling the brand story through short films, animations or customer testimonials.
- Running presentations or live demos at scheduled times.
- Displaying social media or live data to create energy and engagement.
Your goal shapes everything else: screen size, placement, content style and even the stall layout. A wall meant to attract people from 20 metres away is built very differently from one used for close-up product demonstrations.
Step 2: Understand Your Stall Size and Layout
The size and type of your stall decide how much LED you can sensibly use.
- Small stalls (9–18 sq. m): A modest wall mounted on the back panel is usually enough. Oversized screens will crowd the space and leave no room for visitors or meetings.
- Medium stalls (18–54 sq. m): You can use a larger main wall or combine a central screen with smaller secondary displays.
- Large or island stalls (54 sq. m and above): Creative options open up, including curved walls, corner installations, floating screens, LED ceilings and multi-sided displays.
Open-sided stalls (two, three or four sides open) offer different viewing angles than single-side stalls, so check where your visitors will approach from. A strong exhibition stall design process always starts with traffic flow, and the LED wall should be placed where it will be seen first and not just where it fits.
Step 3: Choose the Right Pixel Pitch
Pixel pitch is the distance between the centres of two adjacent pixels on an LED screen, measured in millimetres. It is the most important technical choice you will make.
- Smaller pitch (P1.2 to P2.5): Higher resolution and sharper images, designed for close viewing. Best for product demos, detailed graphics and small text.
- Larger pitch (P3 to P4): Lower resolution, but cheaper. Works for bold visuals viewed from further away.
A simple rule of thumb is that the minimum comfortable viewing distance in metres roughly equals the pixel pitch in millimetres. A P2.5 screen looks good from about 2.5 metres or further. If visitors will stand close, such as at a demo counter, choose a finer pitch. If the wall is mainly an attention-grabber seen from the aisle, a slightly coarser pitch can save budget without hurting impact.
Resist the urge to buy the finest pitch just to be safe. Resolution you cannot see from your viewing distance is money wasted. Match the pitch to how people will actually experience your stall.
Step 4: Get the Size and Aspect Ratio Right
LED video walls are built from modular panels, so you can create almost any shape. But content looks best when it matches the screen’s aspect ratio.
- 16:9 suits standard video, presentations and most pre-made content.
- Ultra-wide or panoramic walls make dramatic backdrops but need custom-designed content.
- Vertical or portrait walls work well for fashion, product showcases and entrance features.
- Curved or cylindrical designs add visual drama but need careful content mapping.
Be realistic about scale. A giant screen with poor content looks worse than a smaller screen with excellent content. Also remember that the bigger the screen, the more power, structure and installation work it needs, which affects both cost and timelines.
Step 5: Plan Placement for Maximum Visibility
Where you put the wall matters as much as how big it is. Consider these points:
- Height: Place the screen so its centre sits near eye level or slightly above, unless it is intended as a high-visibility overhead feature. Screens set too high are hard to read up close.
- Distance from the aisle: Allow enough standing room in front of the wall so visitors can step back and take in the content without blocking the walkway.
- Viewing angles: Check sight lines from every direction people will approach, including from neighbouring stalls and nearby walkways.
- Competing elements: Avoid placing the wall right next to other busy features such as large graphics, moving lights or a neighbour’s screen.
- Reflections and glare: Keep strong spotlights from shining directly onto the screen surface.
A good designer will test sightlines in a 3D model before anything is built. This is one of the key benefits of professional 3D exhibition stall designing: you can see how the LED wall looks from the aisle, from the entrance and from inside the stall before you spend on fabrication.
Step 6: Design the Stall Around the Screen
The best LED video wall installations look like part of the stall, not like a television bolted onto a wall. Consider:
- Framing: Use a clean border, recessed niche or structural frame so the screen feels integrated.
- Material contrast: Pair the glowing screen with textures such as wood, matte laminates, fabric or metal to add depth.
- Lighting balance: Dim or soften surrounding lighting slightly so the screen does not look washed out. Avoid making the stall so dark that the rest of the brand message disappears.
- Colour harmony: The colours in your video content should complement your stall’s palette and brand identity.
- Clear zones: Keep a visitor area in front of the screen and separate product display, meeting and reception zones so they do not compete.
Exhibition stall design is about balance. If the LED wall is the hero, everything around it should support it.
Step 7: Plan Content Before You Plan the Screen
This is the step most exhibitors skip, and it is the most common reason LED walls disappoint. A high-end screen playing weak content is a waste.
Content tips for LED video walls:
- Keep it short and loopable. Most visitors watch for only a few seconds. Aim for loops of 30 to 90 seconds.
- Lead with the main message. Put your brand name, tagline or key offer in the first few seconds.
- Use big, bold visuals. Avoid long paragraphs and small text. If you need to explain details, do it face to face.
- Design for the right resolution. Content must be created at the correct pixel dimensions for your wall. Stretching ordinary video leads to blur.
- Use motion thoughtfully. Smooth, purposeful animation looks premium. Flashing, jarring transitions tire the eye and push people away.
- Choose contrast and legibility. High contrast between text and background keeps your message readable from a distance.
- Include a call to action. Tell people what to do next, whether that is “Visit us at Hall 2”, “Scan to download the catalogue” or “Ask for a demo”.
- Avoid dependence on audio. Exhibition halls are loud, so make sure your content works without sound, and use subtitles where needed.
Ask your designer or content team to share the exact screen resolution early so videos are created to fit. This also helps with your graphics. Our guide on exhibition stall graphics that visitors can understand quickly explains how the same clarity principles apply to printed and digital elements.
Step 8: Consider Brightness, Contrast and Colour Quality
Exhibition halls are brightly lit, so screens must perform in demanding conditions. Look at:
- Brightness (nits): Indoor LED walls for exhibitions typically work well in a moderate brightness range. Too bright and the screen becomes uncomfortable to look at up close; too dim and it disappears under hall lighting.
- Refresh rate: A higher refresh rate avoids flicker, especially when visitors film your stall with their phones.
- Contrast and black levels: Good contrast makes images look rich and deep.
- Colour consistency: Quality panels from the same batch keep colours uniform across the whole wall, which prevents visible patches.
- Viewing angle: Wide viewing angles keep the picture clear for people standing off to the side.
Ask your supplier for a live demonstration or sample where possible. Specifications on paper do not always match what you see on the show floor.
Step 9: Plan Structure, Power and Technical Support
Behind every impressive screen is careful engineering. Your stall fabricator should plan for:
- Load-bearing support: LED panels have weight. The supporting frame, truss or wall must be strong enough, and safely anchored.
- Power supply: Calculate the total power load and confirm that your allocated electrical connection can handle it. Request additional power from the organisers in advance if needed.
- Cabling and controllers: Plan the video processor, media player and cable routing, and keep everything hidden but accessible.
- Ventilation and heat: LED walls produce heat, so make sure there is airflow behind the screen.
- Service access: Leave a way to reach panels from the back or front in case a module needs replacement during the show.
- Backup: Carry spare modules, a backup media player and a duplicate copy of your content on a separate drive.
Good exhibition stall fabrication makes sure the structure, wiring and finishing are done safely and neatly, so the screen looks seamless and runs reliably through the entire exhibition.
Step 10: Budget Wisely
LED video walls vary widely in cost. The main factors are:
- Pixel pitch (finer pitch costs more)
- Total screen area
- Brand and build quality of panels
- Rental or purchase
- Content creation
- Installation, structure and technical staff
- Transport and on-site support
For most exhibitors, renting LED walls for a show is more practical than buying, since technology improves quickly and storage and maintenance can be costly. If you take part in many shows each year, purchasing a modular system may make sense, but only if your designs reuse it effectively.
Do not forget content in your budget. Custom animations and videos often deliver more value than a bigger screen.
Common Mistakes to Avoid
- Choosing size before purpose. A bigger screen is not always better.
- Ignoring viewing distance. Wrong pixel pitch leads to blurry images or wasted money.
- Using low-quality content. Pixelated or poorly designed videos weaken your brand.
- Overloading the loop. Too much information confuses visitors.
- Forgetting power and structure. Technical problems on show day are costly and embarrassing.
- Placing the screen badly. Poor sightlines and glare limit its impact.
- Leaving the planning too late. LED walls need time for design, procurement, testing and content creation.
- Skipping a test run. Always test the full setup, content included, before the show opens.
Planning Timeline: A Simple Checklist
- 8 to 10 weeks before the show: Define goals, set the budget and brief your stall designer.
- 6 to 8 weeks before: Finalise the 3D design, screen size and pixel pitch.
- 4 to 6 weeks before: Begin content creation and confirm power requirements with the organisers.
- 2 to 4 weeks before: Complete fabrication and finalise content.
- 1 week before: Test the screen, content and controllers. Prepare backups.
- At the venue: Install, calibrate brightness, run a full test and brief your team.
If you want deeper guidance on briefing your designer, read our article on what information to give an exhibition stall designer before starting a project.
How LED Video Walls Fit Into the Bigger Picture
An LED video wall is one part of a full exhibition strategy. It works best alongside:
- Clear, scannable stall graphics
- Smart lighting and branded surfaces
- Comfortable meeting spaces
- Product displays or interactive zones
- Trained staff who engage visitors
For example, pairing a video wall with interactive technology in your exhibition stall can turn passive viewers into active participants. And choosing the right surface finish for your exhibition stall and flooring ensures the whole stand looks polished around the screen.
If you are still looking for the right partner to bring these elements together, our guide to choosing an exhibition stall design company in Ahmedabad is a helpful starting point.
Why Work With Connectbase Communications
At Connectbase Communications, we treat the LED video wall as part of a complete stall concept, not an add-on. Our team handles:
- Concept and layout planning based on your goals, brand and budget
- Realistic 3D visualisation so you can approve the design with confidence
- Custom fabrication and finishing with quality materials and clean workmanship
- LED integration including structure, power planning and installation support
- On-site execution so your stall is ready on time for opening day
Explore our core services:
Frequently Asked Questions
1. What size LED video wall do I need for my exhibition stall?
It depends on your stall size, viewing distance and goals. Smaller stalls often work well with a compact wall on the back panel, while larger stalls can support multi-screen or feature installations. A designer can model options in 3D before you decide.
2. Which pixel pitch is best for exhibitions?
For close viewing, finer pitches such as P1.8 to P2.5 give sharp results. For attention-grabbing displays viewed from a distance, P3 or above can be enough. Match the pitch to how far visitors will stand.
3. Should I rent or buy an LED video wall?
Rental suits most one-off or occasional exhibitors. Buying only makes sense if you exhibit frequently and can reuse the system across designs.
4. Can I use my existing videos on an LED wall?
Sometimes, but low-resolution or wrongly formatted videos can look blurry or cropped. Always adapt content to your wall’s exact resolution and aspect ratio.
5. How early should I start planning?
Ideally 8 to 10 weeks before the show, which leaves enough time for design, content, procurement and testing.
6. Do LED video walls need special power arrangements?
Yes. They can draw significant power, so confirm your load with the organisers and your fabricator early.
Final Thoughts
A well-planned LED video wall can make your exhibition stall impossible to ignore. But the best results come from clear goals, the right technical choices, thoughtful design and strong content, not from simply buying the biggest screen. Plan early, think about your visitors’ experience and make sure every element of your stall works together.
Ready to plan an exhibition stall with a standout LED video wall? Connectbase Communications can help you move from idea to a show-ready stand.
Website: www.connectbasecommunications.com
Email: bhavesh.connectbase@gmail.com
