
September 25, 2026
connectc1
Every successful exhibition stand starts long before the first sketch is drawn. It starts with a well-structured design brief. Whether you’re a marketing manager planning your company’s presence at an upcoming trade show or a business owner stepping into the exhibition world for the first time, the quality of your design brief will directly determine the quality of your final stall. At Connectbase Communications, we’ve worked with hundreds of exhibitors, and one pattern is unmistakable: the exhibitors who arrive with a clear, detailed brief consistently walk away with stalls that perform better — visually, functionally, and commercially.
In this guide, we’ll break down exactly what an exhibition stall design brief is, why it matters, and how you can create one that gets your design team (in-house or outsourced) moving in the right direction from day one.
What Is an Exhibition Stall Design Brief?
An exhibition stall design brief is a document that communicates your goals, brand identity, budget, space requirements, and functional needs to your exhibition stand design company. Think of it as the blueprint that guides every subsequent decision — from layout and material selection to lighting, signage, and interactive elements.
Without a brief, designers are forced to guess. They might create a visually striking stand that completely misses your lead-generation goals, or a functional layout that doesn’t reflect your brand’s personality. A brief eliminates this guesswork and aligns everyone — you, your marketing team, and your design partner — around a shared vision.
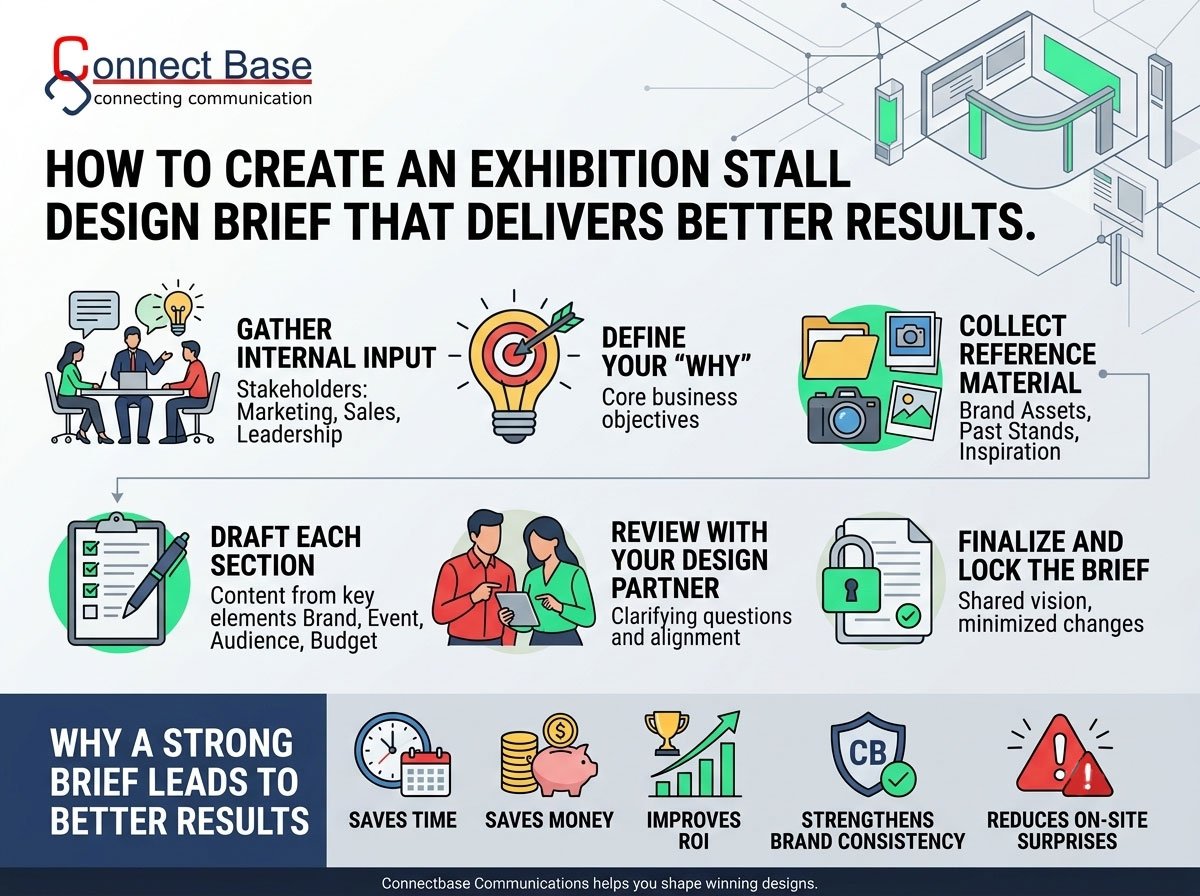
Why a Strong Brief Leads to Better Results
- Saves Time. A detailed brief reduces the number of revision rounds because the design team understands your expectations from the start.
- Saves Money. Fewer revisions mean fewer billable hours and less wasted material during prototyping or fabrication.
- Improves ROI. A brief that includes your business objectives (lead generation, brand awareness, product launches) ensures the stand is designed to actually achieve those outcomes — not just look good in photos.
- Strengthens Brand Consistency. When your brand guidelines are clearly documented, your exhibition stand becomes a true extension of your brand identity, rather than a one-off creative interpretation.
- Reduces On-Site Surprises. Clear technical specifications (space dimensions, venue rules, power requirements) prevent last-minute fabrication or installation issues.
If you’re exploring different formats for your presence at a show, it’s worth reviewing our breakdown of custom exhibition stall design versus more flexible, budget-friendly portable exhibition stands — the right brief looks slightly different depending on which route you choose.
The Core Elements of a Winning Exhibition Stall Design Brief
1. Company and Brand Overview
Start with the basics: your company name, industry, target audience, and a short description of what makes your brand unique. Include your brand guidelines — logo files, color codes, typography, and tone of voice — so the design team can maintain consistency across every visual element of the stand.
2. Event Details
Specify the exhibition name, venue, dates, and hall/stand number if already allotted. Include venue-specific rules (height restrictions, fire safety regulations, rigging permissions) since these directly affect what can and cannot be built.
3. Stand Size and Location
Note your stall’s exact dimensions, shape (corner, island, peninsula, or row stand), and any structural elements nearby, such as pillars or walkways. If you already have a floor plan from the organizer, attach it. This single detail can save days of back-and-forth clarification.
4. Business Objectives
This is arguably the most overlooked — yet most important — section. Are you launching a new product? Trying to generate a specific number of qualified leads? Strengthening brand visibility in a new market? Hosting client meetings or product demos? Each objective calls for a different design approach: a lead-generation-focused stand needs open, inviting entry points, while a stand built around private meetings needs enclosed, quieter zones.
5. Target Audience
Describe who will be visiting your stand — their industry, seniority level, and what they’re likely looking for. A stand designed to impress C-suite decision-makers looks very different from one designed to attract high foot traffic from general attendees.
6. Functional Requirements
List the practical elements your stand needs to include:
- Reception or meeting area
- Product display units or shelving
- Private meeting rooms or lounges
- Storage space
- AV equipment, screens, or interactive displays
- Charging stations or Wi-Fi access points
- Pantry or refreshment counters
7. Design Style and Inspiration
Share reference images, competitor stands you admire, or previous stalls your company has used. Even a Pinterest board or a folder of screenshots helps designers understand your visual preferences faster than words alone.
8. Budget
Be upfront about your budget range. This isn’t about revealing your entire financial hand — it’s about ensuring the design team proposes something realistic and achievable, rather than presenting concepts that later need to be stripped down due to cost.
9. Timeline
Outline key milestones: when you need initial concepts, final design approval, fabrication completion, and installation/dismantling dates. Exhibition builds often involve tight turnarounds, so clarity here prevents avoidable delays.
10. Sustainability Preferences
More exhibitors today are prioritizing reusable structures and eco-friendly materials. If sustainability matters to your brand, state it clearly so the design team can source appropriate materials and construction methods from the outset.
Step-by-Step: How to Write Your Brief
Step 1: Gather Internal Input.
Before writing anything, consult stakeholders across marketing, sales, and leadership. Their goals for the event should shape the brief.
Step 2: Define Your “Why.”
Write one clear sentence describing why you’re exhibiting. Everything else in the brief should support this central purpose.
Step 3: Collect Reference Material.
Compile brand assets, past stand photos, competitor examples, and venue floor plans.
Step 4: Draft Each Section.
Use the ten elements above as your outline. Keep language specific — vague statements like “we want something modern” are far less useful than “we want a minimalist design using natural wood tones and backlit signage, similar to [reference image].”
Step 5: Review With Your Design Partner.
Share the draft with your exhibition stand design company and invite questions. A good design team will ask clarifying questions that sharpen the brief even further.
Step 6: Finalize and Lock the Brief.
Once aligned, finalize the document. This becomes the reference point throughout the design and fabrication process, minimizing scope creep.
Common Mistakes to Avoid
- Being too vague about objectives. “We want a nice stand” gives designers nothing to work with.
- Skipping the budget conversation. This almost always leads to disappointment later in the process.
- Ignoring venue restrictions. Designs that violate height or safety rules get rejected during setup, causing costly last-minute changes.
- Forgetting post-event goals. Will the stand be reused for future shows? Should it be modular or foldable for storage? Not stating this leads to single-use structures that cost more over time.
- Overloading the brief with unrelated information. Keep it focused; excessive detail on irrelevant topics dilutes the sections that matter most.
A Simple Exhibition Stall Design Brief Template
To make this easier, here’s a condensed template you can adapt:
- Company Name & Brand Overview
- Exhibition Name, Venue & Dates
- Stand Size, Shape & Location
- Primary Business Objective(s)
- Target Audience Profile
- Functional Requirements List
- Design Style References
- Budget Range
- Key Timeline Milestones
- Sustainability Preferences (if any)
Keep this document to 2–3 pages. Clarity beats length every time.
How Connectbase Communications Helps
At Connectbase Communications, we don’t just wait for a brief to land in our inbox — we actively help clients shape one. Our design consultants walk you through each of the elements above during an initial discovery call, ensuring nothing important gets missed. From there, our team translates your brief into concept sketches, 3D renders, and eventually a fully fabricated stand that reflects both your brand and your business goals.
If you’re comparing structural options, take a look at our services for modular exhibition stands and double-decker exhibition stalls — both of which benefit enormously from a well-defined brief, since these formats involve more complex engineering and approval processes.
Related Reading
If you found this guide useful, you may also want to explore:
- 10 Exhibition Stall Design Trends to Watch This Year
- How to Choose the Right Exhibition Stand Design Company
- Budgeting for Your First Trade Show: A Complete Guide
Final Thoughts
A great exhibition stall doesn’t begin with design software — it begins with a clear, thoughtful brief. By investing time upfront to define your goals, audience, budget, and functional needs, you set your design partner up to create a stand that doesn’t just look impressive, but actually delivers measurable business results.
Ready to start planning your next exhibition stand? Reach out to the Connectbase Communications team at bhavesh.connectbase@gmail.com or visit www.connectbasecommunications.com to schedule a free consultation. We’ll help you turn your brief into a stand-out presence on the show floor.
